AWS Architecture
AWS Architecture
Documentation
Contents
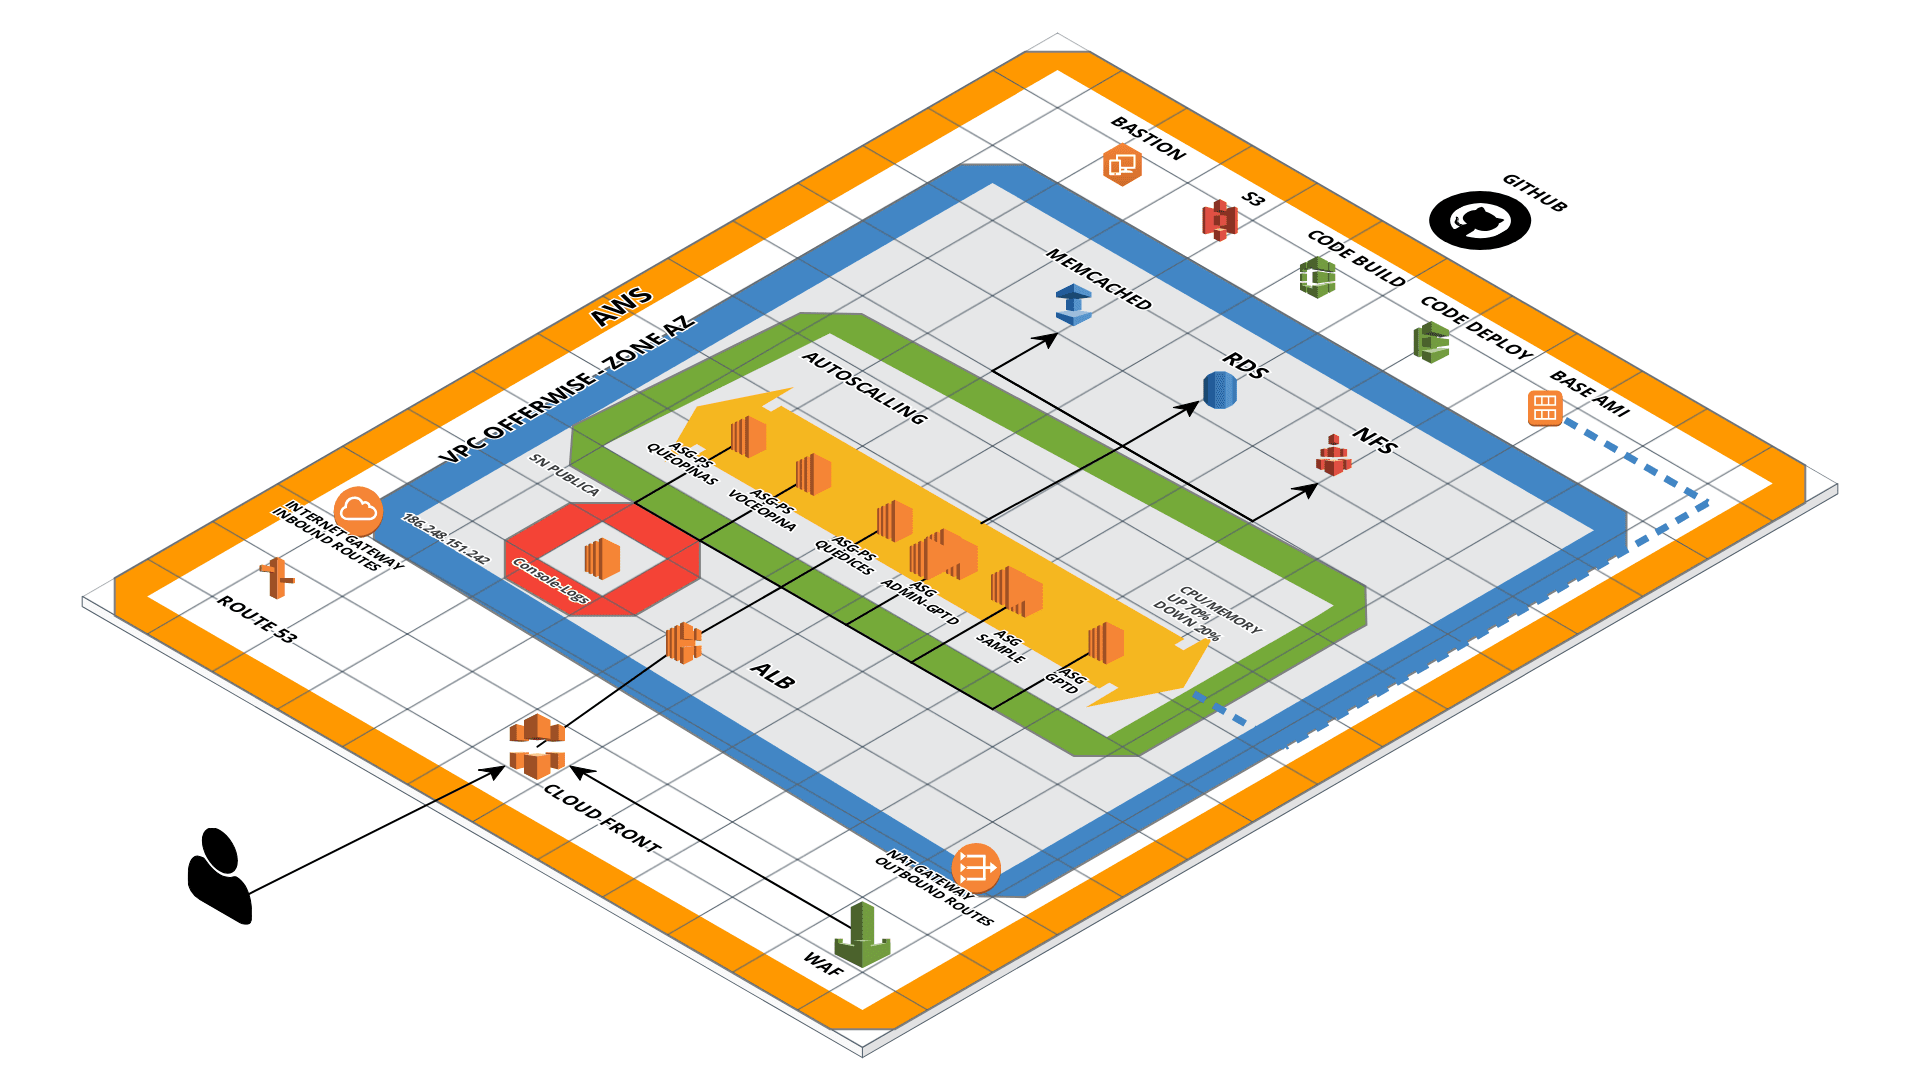
How does it work?
User connects to the application and immediately views the content stored on Cloudfront that delivers the static content of the sites. Then the traffic is directed to the Load Balancer in the ALB model, which distributes it among the instances.
The Cloudfront service is linked to the WAF, which has rules and policies for security and mitigation of attacks on the application of offerwise.
WAF works to prevent any unauthorized data exposure on a website or web-based application by monitoring HTTP and HTTPS requests that are forwarded to CloudFront.
Route 53 provides both internal .prod and external DNS settings.
We have a VPC that allows you to activate resources within our virtual network, being divided into four subnets
:
Subnets Offerwise —- -
-
They are as follows:
- ** 192.168.0.0 / 24: ** Private SN-PROD-D subnet, which is in zone D and has an exit to NAT.
- ** 192.168.1.0 / 24: ** Subnet SN-PROD-C Publica, which is in zone C and has an exit to the Internet Gateway.
- ** 192.168.2.0 / 24: ** Subnet SN-PROD-D Publica, which is in zone D and has an exit to the Internet Gateway.
- ** 192.168.3.0 / 24: ** Private SN-PROD-C subnet, which is in zone C and has an exit to NAT.

The Internet Gateway allows communication between the instances of your VPC and the internet, controlling the entry rules of the instances.
We enabled the Internet Gateway NAT service, controlling the outbound rules so that all instances go out to the internet with the same Public IP address - ** 18.232.16.39 **.
The console-logs machine is in the public area and can only be accessed via the offerwise ip. It can be accessed via ssh and through it you can connect to the instances via their internal ip and we also do the bastion with the bank, so that you can access it in our test environment.

The instances are implemented with Spot in Auto Scalling, which has metrics for up and down machines based on the CPU.
The machines are started with AMIs already prepared in our AWS environment.
We use the Elastic Cache service that provides the MemCached service.
Services
S3
- S3 (Simple Storage Service) is the standard AWS cloud storage service. It stores system configuration files, Cloudfront logs for WAF to scan and system artifacts from OWS and OWS- API.
NFS
The NFS service offers the storage of simple files. In it we store the access logs, instance errors and images. As soon as a new instance goes up the disk, it is automatically mapped to it.
CodeDeploy
The instances in the deployment group are updated according to the latest revision of the application. We have Auto Scalling groups linked to the deployment groups for deploying the instances.
Understanding the CodeDeploy process
-
Devs send the Commit to GitHub.
-
Access CodeDeploy and search for the desired Deploy group.
-
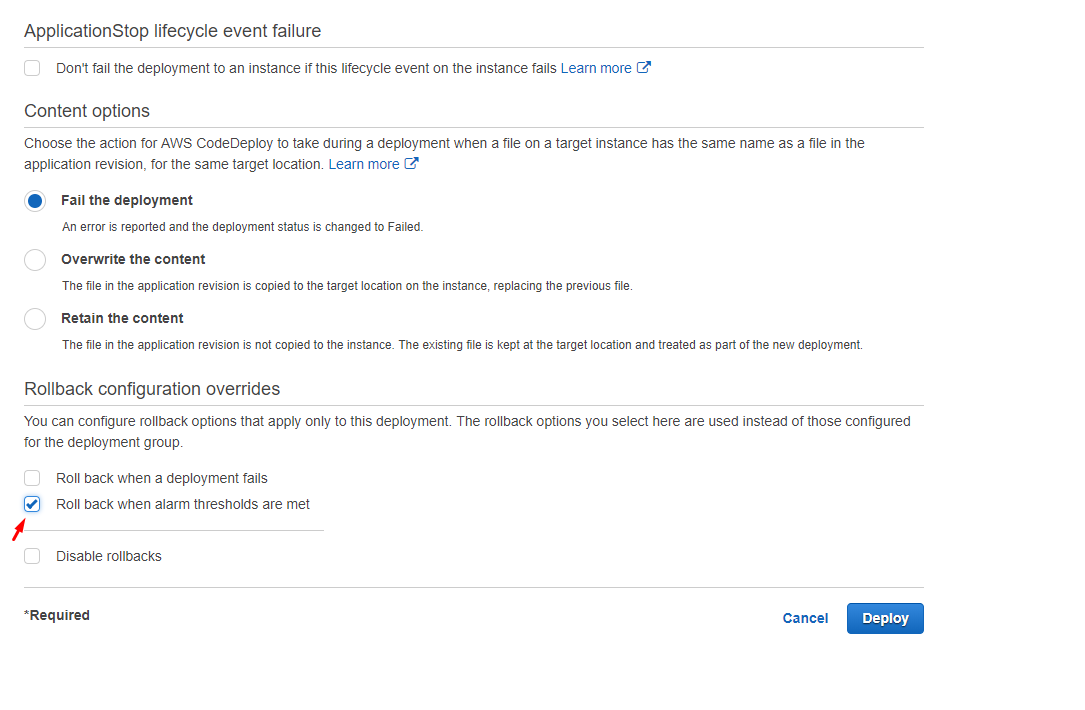
Within the selected Deploy they click on Action and then on Deploy new revision.

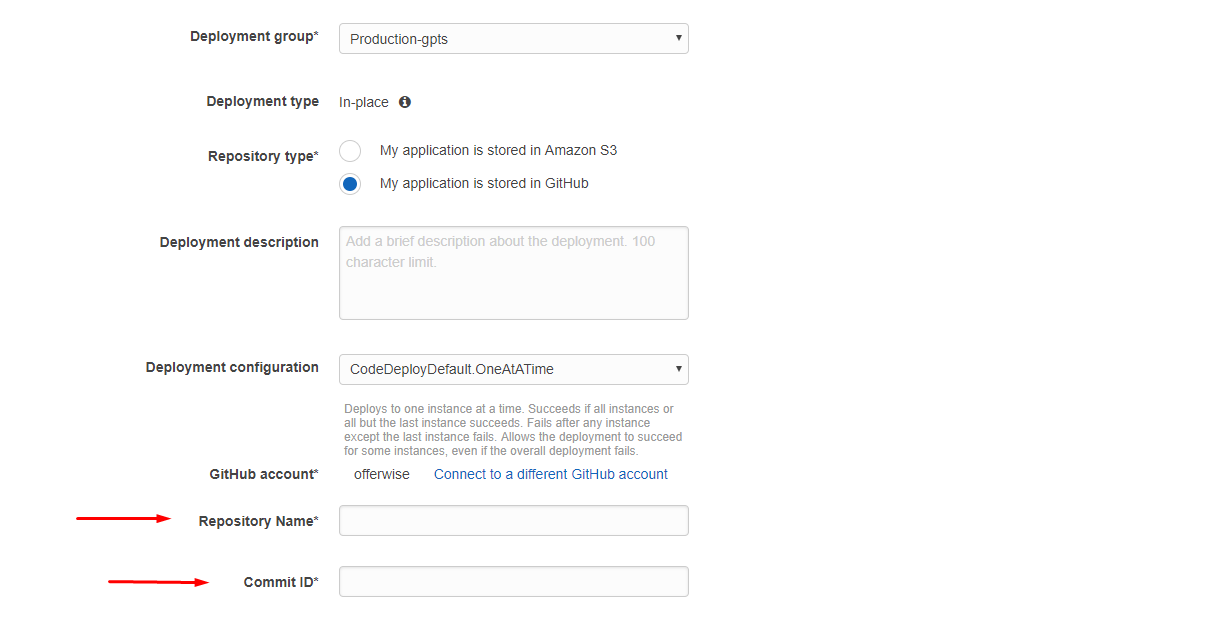
- In Repository type, the checkbox ** My application is stored in GitHub ** must be selected.
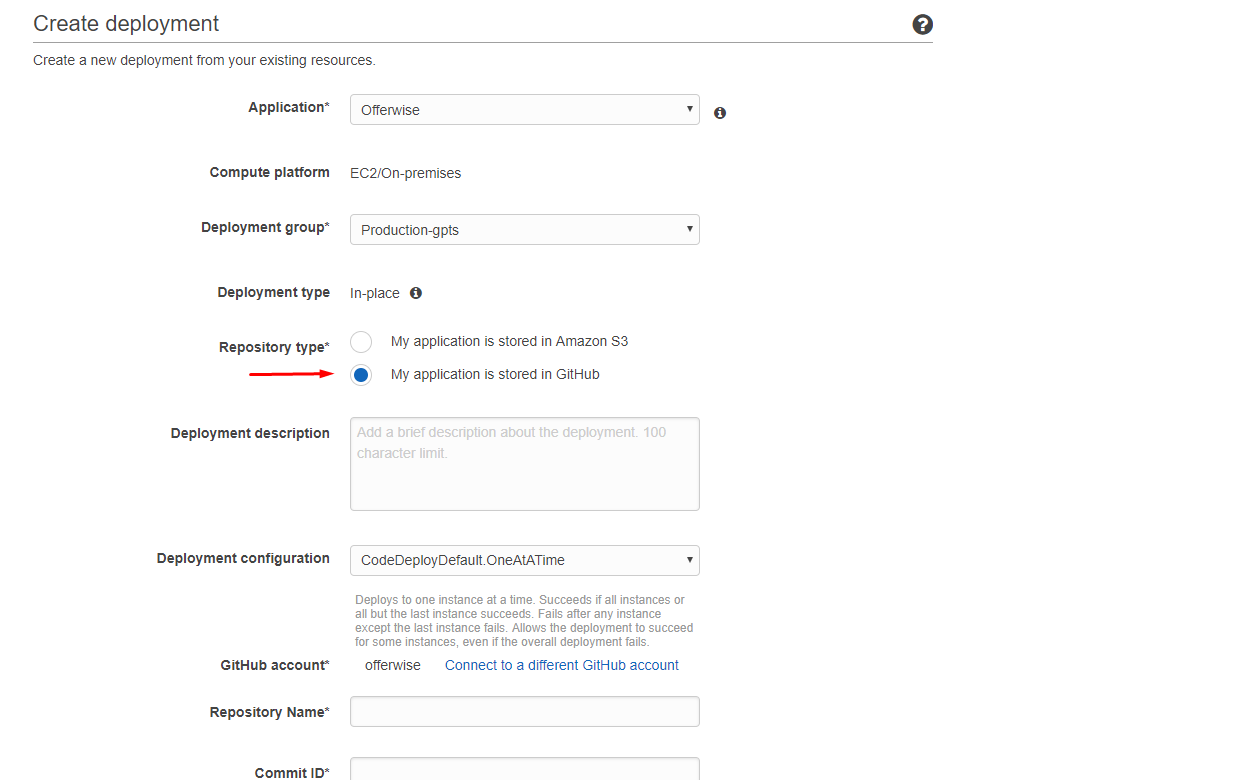
- After that, the GitHub repository and the CommitID for the New Deploy are informed.
- Check this option, because in case of a failed deployment it will perform Rool Back.
CodeBuild
CodeBuild on AWS automatically checks when it has a new commit and runs the routines and creates the files on S3. this Devs access S3 and copy the path of the file generated in it. We pass this file generated in CodeDeploy and the deployment is done.
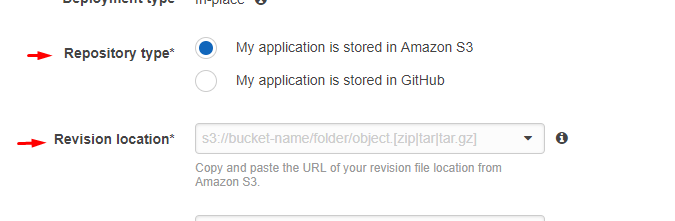
Understanding the CodeBuild process
The Deploy process in CodeBuild is similar to CodeDeploy, however In Repository type the checkbox ** My application is stored in Amazon S3 ** must be selected. After that, the path CodeBuild must be informed spawned from S3 and pass in Revision Location.
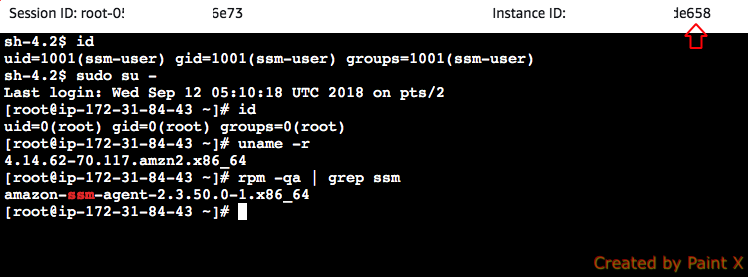
System Manager
-
Access to the machines is done through the System Manager. In this case it is possible to access the EC2 instances without using the bastion or SSH key.
-
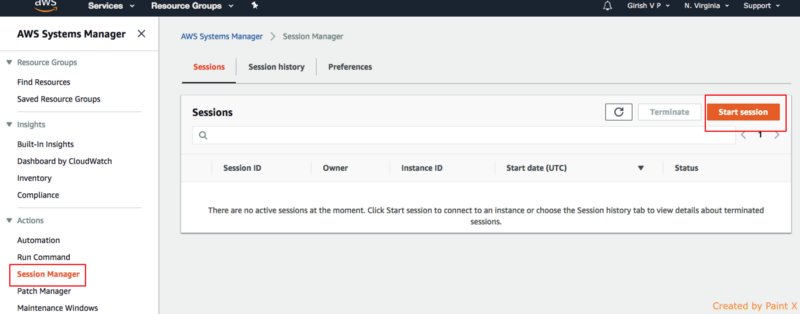
In the AWS Web Console, access the System Manager service.

- Click on Session Manager and then click on “Start Session”.
- In the next window, select the instance and click on “Start Session”.
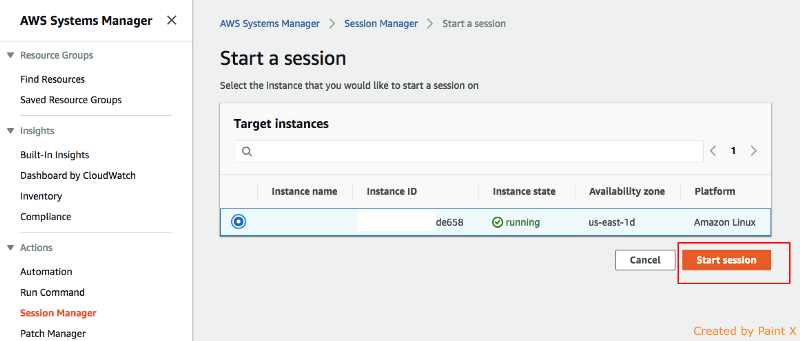
- The operating system console window opens and you can run any command on the instance.